Showing posts with label Video & Tutorial. Show all posts

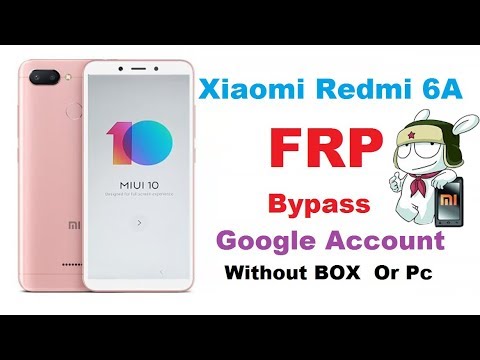
Xiaomi Redmi 6A FRP Bypass Google Account Without BOX Or Pc

Xiaomi Redmi 6A FRP Bypass Google Account Without BOX  Or Pc
Xiaomi Redmi 6A FRP Bypass Google Account Without BOX  Or Pc
This video i am showing you how to remove google account #FRP bypass  #Xiaomi #Redmi_6A. This Is simple & easy to done #bypass.
Subscribe My Channel: https://goo.gl/Zw9a6A
Apex Launcher Link: https://apex-launcher.en.uptodown.com/android/download
My Blog: https://khushitelecom.blogspot.com/
Another Blog: https://firmwarepage.blogspot.com/
If You Like my video Please subscribe my Channel.


খুশি টেলিকম চ্যানেলে আপনাকে স্বাগতম। মোবাইল, কম্পিউটার ও টেকনলোজির নুতন নুতন আপডেট পেতে সাবস্ক্রাইব করে পাশে থাকা বেল আইকন টি প্রেস করুন। সব ধরনের মোবাইল ফ্ল্যাশ ও ফার্মওয়ার আপডেট করে থাকি। অনলাইনে সকল প্রকার ফ্ল্যাশ ও  আনলক করে থাকি।

বিভিন্ন ধরনের লক যেমন- কান্ট্রি লক, এফ আর পি লক, সিকিউরিটি লক, প্যাটার্ন লক সহ সব ধরনের লক খোলা হয়। সব ধরনের ফ্ল্যাশ ফাইল বিক্রি করে থাকি। হার্ডডিস্ক, পেন-ড্রাইভ সহ যে কোন ডিভাইসের মাধ্যমে ফ্ল্যাশ ফাইলের কপি দেয়া হয়। আমাদের কাছে পাবেন সকল প্রকার আপডেট ফ্ল্যাশ টুল, লেটেস্ট বক্স সেটআপ, আপডেট ক্র্যাক টুল (যা দ্বারা ডিভাইস ছাড়াই ফ্ল্যাশ ও আনলক করতে পারবেন) ।

এছাড়াও আমাদের সার্ভিস ও সাপোর্ট পাবেন সপ্তাহে সাতদিন ও দিনে ১০ ঘণ্টা ( সকাল ১১ টা থেকে রাত ৯টা পর্যন্ত ) ## অনলাইন ও অফলাইনে মোবাইল সফটওয়ারের কাজ শিখানো হয়। যে কোন প্রয়োজনে যোগাযোগ করুন- খুশি টেলিকম, নারায়ন পুর বাসষ্ট্যান্ড শাওন মার্কেট ১নং দোকান (শহীদ নুরু আতিক সড়ক), ফোন/ইমু/হোয়াটসএপ +৮৮০১৭১১২২৮১৭৬।

***************Follow me on************
face any problem please contact me on-
➤Instagram: https://goo.gl/89ETQA
➤Facebook: https://goo.gl/F5aW7u
➤Linkedin: https://goo.gl/WkpLHF
➤Twitter : https://goo.gl/q1vXY5
➤YouTube: https://goo.gl/Zw9a6A
➤Google+ : https://goo.gl/gYcisj
=================================================
LIKE | COMMENT | SHARE | SUBSCRIBE
=================================================
Read More

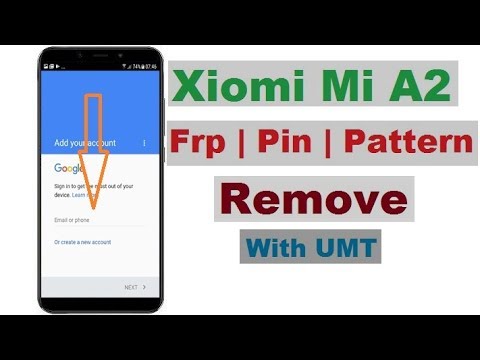
Xiomi Mi A2 Frp | Pin | Pattern Remove With UMT

Xiomi Mi A2 Frp | Pin | Pattern Remove With UMT
#Xiomi Mi A2 Frp Pin Pattern Google Account With Umt. This video i am showing you how to remove google account #FRP Pin Pattern Xiomi Mi A2. This Is simple & easy to done #Remove #FRP Pin Pattern #Xiomi Mi A2 Device.

My Blog: https://khushitelecom.blogspot.com/
Another Blog: https://firmwarepage.blogspot.com/
Please subscribe my Channel. https://goo.gl/Zw9a6A

খুশি টেলিকম চ্যানেলে আপনাকে স্বাগতম। মোবাইল, কম্পিউটার ও টেকনলোজির নুতন নুতন আপডেট পেতে সাবস্ক্রাইব করে পাশে থাকা বেল আইকন টি প্রেস করুন। সব ধরনের মোবাইল ফ্ল্যাশ ও ফার্মওয়ার আপডেট করে থাকি। অনলাইনে সকল প্রকার ফ্ল্যাশ ও  আনলক করে থাকি।

বিভিন্ন ধরনের লক যেমন- কান্ট্রি লক, এফ আর পি লক, সিকিউরিটি লক, প্যাটার্ন লক সহ সব ধরনের লক খোলা হয়। সব ধরনের ফ্ল্যাশ ফাইল বিক্রি করে থাকি। হার্ডডিস্ক, পেন-ড্রাইভ সহ যে কোন ডিভাইসের মাধ্যমে ফ্ল্যাশ ফাইলের কপি দেয়া হয়। আমাদের কাছে পাবেন সকল প্রকার আপডেট ফ্ল্যাশ টুল, লেটেস্ট বক্স সেটআপ, আপডেট ক্র্যাক টুল (যা দ্বারা ডিভাইস ছাড়াই ফ্ল্যাশ ও আনলক করতে পারবেন) ।

এছাড়াও আমাদের সার্ভিস ও সাপোর্ট পাবেন সপ্তাহে সাতদিন ও দিনে ১০ ঘণ্টা ( সকাল ১১ টা থেকে রাত ৯টা পর্যন্ত ) ## অনলাইন ও অফলাইনে মোবাইল সফটওয়ারের কাজ শিখানো হয়। যে কোন প্রয়োজনে যোগাযোগ করুন- খুশি টেলিকম, নারায়ন পুর বাসষ্ট্যান্ড শাওন মার্কেট ১নং দোকান (শহীদ নুরু আতিক সড়ক), ফোন/ইমু/হোয়াটসএপ +৮৮০১৭১১২২৮১৭৬।

If You Like my video Please subscribe my Channel.
***************Follow me on************
face any problem please contact me on-
➤Instagram: https://goo.gl/89ETQA
➤Facebook: https://goo.gl/F5aW7u
➤Linkedin: https://goo.gl/WkpLHF
➤Twitter : https://goo.gl/q1vXY5
➤YouTube: https://goo.gl/Zw9a6A
➤Google+ : https://goo.gl/gYcisj
=================================================
LIKE | COMMENT | SHARE | SUBSCRIBE
=================================================
Read More

Mediacom M-PPBG5 PhonePad Duo G5 Google Account FRP Reset Done Successfully

Mediacom M-PPBG5 PhonePad Duo G5 Google Account FRP Reset Done Successfully
Mediacom M-PPBG5 PhonePad Duo G5 Google Account FRP Reset Done Successfully 
Here I Am Share How To Remove FRP From Mediacom M-PPBG5 PhonePad Duo G5 Mobile. 
Some Days Ago I Receive A Mediacom M-PPBG5 PhonePad Duo G5 Mobile From Another Shop  He is Hard Reset This device Than Got Google Account  FRP. At Last He Come To My Shop. Than I Am Trying To Remove Google Account Frp. At First I Am Trying To Infinity Cm2 With Custom Boot File But Boot Error,Try Nck Boot Error, Try 7.0 Boot File Also Error, Try MT6580 Format Frp Address With Latest Sp Flash Tool Also Aaii Da Error.
At Last I Am Done Successfully Reset Google Account FRP With A Simple Method.
Here I Am Explain The Process Step By Step.
Mediacom M-PPBG5 PhonePad Duo G5 Google Account FRP Reset Done Succesfully
Requirements: 1. Download This File Only 1.3 k/Bytes
Process: ## The requirements of phone is battery backup of 40% to 50%
**First Download All Requirements & extract the Downloaded files on your computer.
** Install the USB Drivers on your pc (skip if drivers are already installed).
**Open the SP Flash Tool and Change Download Agent with DA_SWSEC.bin from the Tools folder.
Mediacom M-PPBG5 PhonePad Duo G5 Google Account FRP Reset Done Succesfully
** Select The Scatter Loading & Load the Scatter File from the Frp Remove folder.
Mediacom M-PPBG5 PhonePad Duo G5 Google Account FRP Reset Done Succesfully
** Select The Format Option Than Write The FRP Address & Click Start.
Mediacom M-PPBG5 PhonePad Duo G5 Google Account FRP Reset Done Succesfully
** Click on Start Button on SP Flash Tool to Begin the Flashing.
Mediacom M-PPBG5 PhonePad Duo G5 Google Account FRP Reset Done Successfully
** Connect your Smartphone to the computer using the USB Driver.
** Pop up Green Ring will appear at the end of successful Format FRP.
Enjoy Your self.
Caution:[*] Take a Backup of your phone data before flashing, upgrading or installing the firmware on your phone. This can help to recover your data whenever anything wrong happens.
***************Follow me on************
face any problem please contact me on-
**Instagram: https://goo.gl/89ETQA
***Facebook: https://goo.gl/F5aW7u
***Linkedin: https://goo.gl/WkpLHF
****Twitter: https://goo.gl/q1vXY5
****YouTube: https://goo.gl/Zw9a6A
Google Plus: https://goo.gl/gYcisj
***************************************


Read More

All Samsung Android 7.0 7.1.1 FRP Bypass Without Pc, box & combination latest security 2018

All Samsung Android 7.0 7.1.1 FRP Bypass Without Pc, box & combination latest security 2018
Hello Friends In This video tutorial i am going to fix all Samsung Android 7.0 7.1.1 FRP Bypass Without Pc, box & combination latest security 2018. Calculator Method Fix *#0808# & (+30012012732+ Not Work. New Update Solution FRP Google Account Samsung Galaxy J7 Prime g610f Fix (+30012012732+ Not Work.  Its Work On All Samsung Android 7.0 & 7.1.1 such as Samsung J7 Prime, Samsung j5 prime (G570F), J510f.


Read More

How to upgrade Samsung Galaxy J7 Prime Updated To Nougat 7.0

How to upgrade Samsung Galaxy J7 Prime Updated To Nougat 7.0
Hello Friends In This Video Here I Am Showing You How to upgrade Samsung Galaxy J7 Prime Updated To Nougat 7 0k, Its Very Easy Simple Trick. Please Watch The Full Video.
==========================================
Firmware Link: https://goo.gl/a1Lso4
Driver Link : https://goo.gl/msSxmY
Odin Tool Link: https://goo.gl/vCX3Ge
My Blog Site: https://goo.gl/Jq3KUV
Firmware Site: https://goo.gl/t4LVKJ
=========================================
Please Subscribe My Channel.
=========================================
Please Watch My Others Video :
[Solved] Samsung J2 Pro SM-J250F FRP remove 100%: https://youtu.be/6yAC13UU-dA
Flash Nokia Microsoft Lumia । Windows Phone  | Upgrade: https://youtu.be/9VL4WCKjFO0
Asus ZenFone 3 Max ZC520TL X008D Remove Google Account FRP: https://youtu.be/W9DYE8GueMw
=========================================
For more info or face any problem please contact me on-
Facebook page: fb.com/khushitelecom, My Facebook: fb.com/gsmlanin, Follow on Twitter: twitter.com/gsmlanin.
=========================================


Read More

[Solved] Samsung J2 Pro SM-J250F FRP remove 100%

[Solved] Samsung J2 Pro SM-J250F FRP remove 100%
Hello Friends, I am showing to you How To Remove Frp (Factory reset protection) Samsung J2 Pro SM-J250F. It Is Very Easy way to bypass Your Samsung J2 Pro SM-J250F. 
ADB FRP Tool Link: bit.ly/androidfrp
Driver Link: https://goo.gl/hxbgd4
==========================================
Please Subscribe my channel for More videos.
==========================================
Thank you for watching the video.
==========================================
For more info or face any problem please contact me on-
Facebook page: fb.com/khushitelecom, My personal Facebook: fb.com/gsmlanin, Follow on Twitter: twitter.com/gsmlanin
I am trying to give my best but use this at your risk, We don,t responsible if there will be something get wrong with you.Thanks for choosing US & All the best. 
==========================================


Read More

How to Remove Google Account Frp lock Nokia 3 Ta 1032 Android 7 0 By Cm2

How to Remove Google Account Frp lock Nokia 3 Ta 1032 Android 7 0 By Cm2
Hello Friends Today In This Video I am Showing You How to Remove Google Account Frp lock Nokia 3 Ta 1032 Android 7 0 By Cm2. It Is Simple & Easy Work. You Must Be A Infinity Cm2 Dongol.
==========================================
Infinity Cm2 Server Link: https://goo.gl/iGwQ2G
My Blog Site: https://goo.gl/Jq3KUV
Firmware Site: https://goo.gl/t4LVKJ
=========================================
Please Subscribe My Channel.
=========================================
Please Watch My Others Video :
[Solved] Samsung J2 Pro SM-J250F FRP remove 100%: https://youtu.be/6yAC13UU-dA
Flash Nokia Microsoft Lumia । Windows Phone  | Upgrade: https://youtu.be/9VL4WCKjFO0
Asus ZenFone 3 Max ZC520TL X008D Remove Google Account FRP: https://youtu.be/W9DYE8GueMw
=========================================
For more info or face any problem please contact me on-
Facebook page: fb.com/khushitelecom, My Facebook: fb.com/gsmlanin, Follow on Twitter: twitter.com/gsmlanin.
=========================================


Read More

[Solved] Samsung J7 prime G610F Custom binary blocked by FRP lock

[Solved] Samsung J7 prime G610F Custom binary blocked by FRP lock
Hello Friends Here I Am Showing You How To Remove Samsung J7 prime G610F Custom binary blocked by FRP lock, Its Very Easy Simple Trick. Please Watch The Full Video.
==========================================
Firmware Link: https://goo.gl/a1Lso4
Driver Link : https://goo.gl/msSxmY
Odin Tool Link: https://goo.gl/vCX3Ge
My Blog Site: https://goo.gl/Jq3KUV
Firmware Site: https://goo.gl/t4LVKJ
=========================================
Please Subscribe My Channel.
=========================================
Please Watch My Others Video :
[Solved] Samsung J2 Pro SM-J250F FRP remove 100%: https://youtu.be/6yAC13UU-dA
Flash Nokia Microsoft Lumia । Windows Phone  | Upgrade: https://youtu.be/9VL4WCKjFO0
Asus ZenFone 3 Max ZC520TL X008D Remove Google Account FRP: https://youtu.be/W9DYE8GueMw
=========================================
For more info or face any problem please contact me on-
Facebook page: fb.com/khushitelecom, My Facebook: fb.com/gsmlanin, Follow on Twitter: twitter.com/gsmlanin.
=========================================


Read More

Samsung J7 Pro SM-J730F 7.0 Nougat root file & rooting tutorial

 Samsung J7 Pro SM-J730F 7.0 Nougat root file & rooting tutorial
Tested Samsung J7 Pro SM-J730F 7.0 Nougat root file & rooting tutorial
This tutorial will guide you to safely Root Samsung J7 Pro SM-J730F 7.0 Nougat with Auto root. The Process is very simple and easy, I am TESTED this root & write the article. just follow the step by step guide to Root.
"Root is needed if you want to Flash Custom ROMs and kernels.You can tweak your phone, overclock the CPU and use rooted application after rooting your device."
Warning:
I am not be held responsible for any kind of damage occurred to your Samsung J7 Pro SM-J730F 7.0 Nougat while following this tutorial. Do it at your own risk. Remember rooting android device may void your warranty. This is only for Samsung J7 Pro SM-J730F 7.0 Nougat Models Not others variant.
Samsung j7 pro sm-j730f root


Step By Step Guide
- Make sure your device has more than 50% battery.
- Download Root file (LINKPassword: gsma2z) from the download section above and unzip the file.


-Setup Samsung Usb Driver (LINK) properly.
- Now Boot your Samsung J7 Pro SM-J730F 7.0 Nougat device into Download Mode. just power off your device and then press, Volume Down + Power + Home. Press Volume Up now to continue to Download Mode.
-Then Connect the phone to your PC via USB cable and the ODIN (LINK)application would notify an added message.If not then check the USB cable or re-install Samsung usb driver.
- choose AP or PDA in Odin Menu and select the CF-Auto-Root-j7y17lte-j7y17ltexx-smj730f.tar.md5* file (You have downloaded and Unzipped, the .tar extension).
- The re-partition is not ticked in the Odin.
- Now click on the start button to start the Flashing process.
- Once the process is completed, you would notice the RESET or PASS message on the ODIN screen.
- Connect your device via USB to your PC.
Now Unlock your device.
Samsung j7 pro sm-j730f root
For more info or face any problem please contact me on-
My Facebook: fb.com/gsmlanin, Follow on Twitter: twitter.com/gsmlanin
I am trying to give my best but use this at your risk, I am don,t responsible if there will be something get wrong with you.Thanks for choosing me & All the best. 

Read More

[SOLVED] Samsung SM-J320F Unknown Imei Baseband & Network Repair Done

[SOLVED] Samsung SM-J320F Unknown Imei Baseband & Network Repair Done
Welcome to Khushi telecom, This blog about of mobiles software problem & Solution. You find all information about android, windows mobiles, iphones- flashing, unlocking, box setup, Flash tools, firmwares. You also get easy tutorial & solution.
Here I have shared How To Solve Samsung SM-J320F Unknown Baseband | Imei Null | Network Repair, I am trying to different. SM-J320F After Repair Imei /Write Cert Phone Imei Null and Baseband Unknown Solve, 100% Tested Solution. I am Use A combination File & Firmware & Root File. You can easily Download from our link. Giving you fresh Firmware Download link.
This Is An Image Of Samsung J320F Unkoown Baseband


Step by Step guide:-
- Make sure your device has more than 50% battery.
- Download This Odin Tool & unzip It.
- Download This Combination File and unzip the file. ( You can Download it from Z3X Shell )
- Now Boot your Samsung J3 SM- J320f device into Download Mode.
-Then Connect the phone to your PC via USB cable and the ODIN application would notify an added message.If not then check the USB cable or re-install Samsung usb driver.
- choose AP or PDA in Odin Menu and select The Combination file (You have downloaded and Unzipped, the .tar extension).
- The re-partition is not ticked in the Odin.
- Now click on the start button to start the Flashing process.
- Once the process is completed, you would notice the RESET or PASS message on the ODIN screen.
- Then your device would automatically  boot into Factory Bynary Power mode.
This Is An Image Of Samsung J320F Unkoown Baseband


- Again Flash your Firmware Same process.
- Root Your Device (Rooting Guide)
Now You Can Write Your Originial Imei Whice contain you box & Backpart of your device.
Note that Imei changing is illegal in some countries. So i will Recomanded You to Write the originial Imei Whice contain you box & Backpart of your device. I am not be held responsible for any kind of damage occurred to your Samsung SM-J320F while following this tutorial. Do it at your own risk.  As this post is only for educational purpose.
or more info or face any problem please contact me on- fb.com/gsmlanin, Follow me twitter.com/gsmlanin, Join Fb Group: https://www.facebook.com/groups/Khushitelecom,
I am trying to give our best but use this at your risk, I don,t responsible if there will be something get wrong with you.Thanks for choosing my blog & All the best.
If you Like my Post Please Share it.


Read More

Samsung SM-G610F 7.0 Network Unlock Done By Z3X | No Need Root

Samsung SM-G610F 7.0 Network Unlock Done By Z3X | No Need Root
Welcome to Khushi telecom, This blog about of mobiles software problem & Solution. You find all information about android, windows mobiles, iphones- flashing, unlocking, box setup, Flash tools, firmwares. You also get easy tutorial & solution.
Here I have shared How to Samsung SM-G610F 7.0 Network Unlock Done By Z3X | No Need Root. This is Tested by me, I am trying to different. Here is explain How to Network unlock Samsung SM-G610F without root,  Photos & log of Z3X Log.
This is an image about G610F Network unlock log
Step by Step Process
First Open Your Device & On your  Developer option Usb debug in Press 7 Times On Build Version.
To read security codes via diagnostic port:
    Warning! Knox warranty must be active (0x00)!
    If you have it voided (0x01(void)), then you can't unlock this phone using sever.
  1. Power on the phone.
  2. Type *#0808# and select 'DM+MODEM+ADB'.
  3. Connect the phone to PC with USB cable, install drivers if needed.
  4. Press 'Read Codes DIAG' button to read security codes.
  
Operation: Read Codes DIAG
Selected model: SM-G610F
Software version: 30.2

Please wait, generating hash codes file, this can take few minutes... OK
Searching Samsung modem... detected COM80
Reading phone info... OK
Model: SM-G610F
AP version: G610FDDU1BQJ7
CSC version: G610FOJV1BQJ7
CP version: G610FDDU1BQJ4
Product code: MID
Phone SN: R58J90T04EV
Unique number: CAJ03029EFEF084
Searching Samsung diag port... detected COM81
Reading phone info... OK
CP version: G610FDDU1BQJ4
CP build: Oct 13 2017 19:17:33
Reading data from phone... OK
Reading NV data... OK
Modem board: SHANNON315
Checking NV data... OK
Calculating... OK
Please wait, calculating codes... OK (time - 00:00:09)
Freeze code: 90858603
NET lock: 74085941
SUB lock: 00000000
SP lock: 00000000
CP lock: 00000000
SIM lock: 00000000
For check lock status: *#7465625#
Done with Samsung Tool PRO v.30.2

Now You Input Freeze code: 90858603 in your Device
Than Input you NET lock: 74085941
Network Unlock Succsesfully unlocked :)
For more info or face any problem please contact me on-fb.com/gsmlanin Follow Me on Twitter: twitter.com/gsmlanin
We are trying to give our best but use this at your risk, We don,t responsible if there will be something get wrong with you.Thanks for choosing US & All the best. 


Read More

[Free] Samsung J7 NXT SM-J701F 7.0 Nougat root file & rooting tutorial

[Free] Samsung J7 NXT SM-J701F 7.0 Nougat root file & rooting tutorial
This tutorial will guide you to safely Root Samsung J7 NXT SM-J701F 7.0 Nougat with Auto root. The Process is very simple and easy, just follow the step by step guide to Root.
"Root is needed if you want to Flash Custom ROMs and kernels.You can tweak your phone, overclock the CPU and use rooted application after rooting your device."
Warning:
I am not be held responsible for any kind of damage occurred to your
Samsung J7 NXT SM-J701F 7.0 Nougat while following this tutorial. Do it at your own risk. Remember rooting android device may void your warranty. This is only for Samsung J7 NXT SM-J701F 7.0 Nougat Models Not others variant.
This Is An Image About Samsung J7 NXT SM-J701F 7.0 Nougat


Step By Step Guide (Video)
- Make sure your device has more than 40% battery.
- Download Root file (LINK  Password- gsma2z) from the download section above and unzip the file.

-Setup Samsung Usb Driver properly (Driver Link Free)
- Now Boot your Samsung J7 NXT SM-J701F 7.0 Nougat device into Download Mode. just power off your device and then press, Volume Down + Power + Home. Press Volume Up now to continue to Download Mode.
-Then Connect the phone to your PC via USB cable and the ODIN (LINK)application would notify an added message.If not then check the USB cable or re-install Samsung usb driver.
- choose AP or PDA in Odin Menu and select the CF-Auto-Root-j7xelte-j7xeltexx-smj701f.tar.md5 * file (You have downloaded and Unzipped, the .tar extension).
- The re-partition is not ticked in the Odin.
- Now click on the start button to start the Flashing process.
- Once the process is completed, you would notice the RESET or PASS message on the ODIN screen.
- Then your device would automatically  boot into recovery mode.
- Done!!! Now your Samsung has recovery updated.
Next step

- Connect your device via USB to your PC.
Now Unlock your device.
*** In case you get stuck at boot loop, go to recovery and wipe cache and data.
For more info or face any problem please contact me on-
Facebook page: facebook.com/khushitelecom, My personal Facebook: facebook.com/laninimtiaz
Subscribe my YouTube: youtube.com/c/GsmLanin1, Follow on Twitter: twitter.com/khushi_telecom
We are trying to give our best but use this at your risk, We don,t responsible if there will be something get wrong with you.Thanks for choosing US & All the best. 

Read More

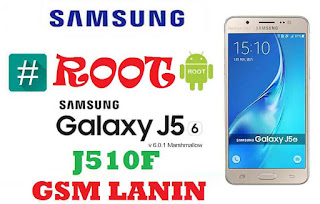
Root Samsung Galaxy J5 SM-J510F Android 6.0.1 Marshmallow

Root Samsung Galaxy J5 SM-J510F Android 6.0.1 Marshmallow
Hello friend,s how are you? Hope everybody is good & well. Today i am talk to about How to root Samsung J5 SM-J510F Android 6.0.1 Marshmallow
This tutorial will guide you to safely Root Samsung J5 SM-J510F Android 6.0.1 Marshmallow  with TWRP. Here we will be using TWRP recovery to Flash the SuperSu Zip file to get root access on Samsung J5 SM-J510F Android 6.0.1 Marshmallow . The Process is very simple and easy, just follow the step by step guide to Root.
"Root is needed if you want to Flash Custom ROMs and kernels.You can tweak your phone, overclock the CPU and use rooted application after rooting your device."
Warning:
I am not be held responsible for any kind of damage occurred to your Samsung J5 SM-J510F Android 6.0.1 Marshmallow  while following this tutorial. Do it at your own risk. Remember rooting android device may void your warranty. This is only for Samsung J5 SM-J510F Android 6.0.1 Marshmallow Models Not 5.11 & 7.0 variant.

Samsung galaxy J5 SM-J510F

Download Samsung Galaxy J5 SM-J510F Android 6.0.1 Root file
Step By Step Guide
-Install Samsung USB Driver (If Installed skip This)
- Download TWRP Recovery file from the download section above and unzip the file.
- Now Boot your Samsung J5 SM-J510F Android 6.0.1 Marshmallow  device into Download Mode. just power off your device and then press, Volume Down + Power + Home. Press Volume Up now to continue to Download Mode.
-Then Connect the phone to your PC via USB cable and the ODIN application would notify an added message.If not then check the USB cable or re-install Samsung usb driver.
- choose AP or PDA in Odin Menu and select the TWRP Recovery file (You have downloaded and Unzipped, the .tar extension).
- The re-partition is not ticked in the Odin.
- Now click on the start button to start the Flashing process.
- Once the process is completed, you would notice the RESET or PASS message on the ODIN screen.
- Then your device would automatically  boot into recovery mode.
- Done!!! Now your Samsung has TWRP recovery updated.
Next step
- Connect your device via USB to your PC.
- Transfer the UPDATE-SuperSU-v2.68-20160228150503.zip file to the internal memory  of your Samsung device.
- Now Boot your device into recovery mode (press and hold Volume Down button + press Power button)
- Install from sd card & select UPDATE-SuperSU-v2.68-20160228150503.zip, Than reboot your device.
*** In case you get stuck at boot loop, go to recovery and wipe cache and data.
For more info or face any problem or need any other root file please contact me on-
Facebook page: fb.com/khushitelecom, My personal Facebook: fb.com/gsmlanin Subscribe my YouTube: youtube.com/c/GsmLanin1, Follow on Twitter: twitter.com/gsmlanin
We are trying to give our best but use this at your risk, We don,t responsible if there will be something get wrong with you.Thanks for choosing US & All the best.
 
PLEASE SHARE, COMMENT & LIKE.  
 
Read More

Root Samsung Galaxy S6 SM-G920F nougat 7.0 Easy tutorial & Root File Download

Root Samsung Galaxy S6 SM-G920F nougat 7.0 Easy tutorial & Root File Download
Hello friend,s how are you? Hope everybody is good & well. Today i am talk to about How to root Samsung S6 SM-G920F 7.0 nougat.
This tutorial will guide you to safely Root Samsung S6 SM-G920F 7.0 nougat with TWRP. Here we will be using TWRP recovery to Flash the SuperSu Zip file to get root access on Samsung S6 SM-G920F 7.0 nougat. The Process is very simple and easy, just follow the step by step guide to Root.
"Root is needed if you want to Flash Custom ROMs and kernels.You can tweak your phone, overclock the CPU and use rooted application after rooting your device."
Warning:
I am not be held responsible for any kind of damage occurred to your Samsung S6 SM-G920F 7.0 nougat while following this tutorial. Do it at your own risk. Remember rooting android device may void your warranty. This is only for Samsung S6 SM-G920F 7.0 nougat Models Not 5.11 & 6.0 variant.
Pre-Requirements
- Make sure your device has more than 40/50% battery.
Download Samsung S6 SM-G920F 7.0 nougat root file  


Step By Step Guide
-Install Samsung USB Driver (If Installed skip This)
- Download TWRP Recovery file from the download section above and unzip the file.
- Now Boot your Samsung S6 SM-G920F 7.0 nougat device into Download Mode. just power off your device and then press, Volume Down + Power + Home. Press Volume Up now to continue to Download Mode.
-Then Connect the phone to your PC via USB cable and the ODIN application would notify an added message.If not then check the USB cable or re-install Samsung usb driver.
- choose AP or PDA in Odin Menu and select the TWRP Recovery file (You have downloaded and Unzipped, the .tar extension).
- The re-partition is not ticked in the Odin.
- Now click on the start button to start the Flashing process.
- Once the process is completed, you would notice the RESET or PASS message on the ODIN screen.
- Then your device would automatically  boot into recovery mode.
- Done!!! Now your Samsung has TWRP recovery updated.
Next step
- Connect your device via USB to your PC.
- Transfer the 7.0 SuperSu zip file to the internal memory  of your Samsung device.
- Now Boot your device into recovery mode (press and hold Volume Down button + press Power button)
- Install from sd card & select 7.0 supersu zip, Than reboot your device.
*** In case you get stuck at boot loop, go to recovery and wipe cache and data.
For more info or face any problem or need any other root file please contact me on-
Facebook page: fb.com/khushitelecom, My personal Facebook: fb.com/gsmlanin Subscribe my YouTube: youtube.com/c/GsmLanin1, Follow on Twitter: twitter.com/gsmlanin
We are trying to give our best but use this at your risk, We don,t responsible if there will be something get wrong with you.Thanks for choosing US & All the best.
 
PLEASE SHARE, COMMENT & LIKE.  
 
Read More

Samsung J2 SM-J200GU root file & rooting tutorial

Samsung J2 SM-J200GU root file & rooting tutorial
This tutorial will guide you to safely Root Samsung J2 (J200GU) with SuperSU. Here we will be using TWRP recovery to Flash the SuperSu Zip file to get root access on Samsung J2 SM-J200GU. The Process is very simple and easy, just follow the step by step guide to Root.
"Root is needed if you want to Flash Custom ROMs and kernels.You can tweak your phone, overclock the CPU and use rooted application after rooting your device."
Warning:
I am not be held responsible for any kind of damage occurred to your Galaxy J2 SM-J200GU while following this tutorial. Do it at your own risk. Remember rooting android device may void your warranty. This is only for SM-J200GU Models Not J200H variant.
 
Pre-Requirements

- Make sure your device has more than 40% battery.
Download Samsung J200GU root file   
Step By Step Guide
- Download TWRP Recovery file from the download section above and unzip the file.
- Now Boot your Samsung J2 SM-J200GU device into Download Mode. just power off your device and then press, Volume Down + Power + Home. Press Volume Up now to continue to Download Mode.
-Then Connect the phone to your PC via USB cable and the ODIN application would notify an added message.If not then check the USB cable or re-install Samsung usb driver.
- choose AP or PDA in Odin Menu and select the TWRP Recovery file (You have downloaded and Unzipped, the .tar extension).
- The re-partition is not ticked in the Odin.
- Now click on the start button to start the Flashing process.
- Once the process is completed, you would notice the RESET or PASS message on the ODIN screen.
- Then your device would automatically  boot into recovery mode.
- Done!!! Now your Samsung has TWRP recovery updated.
Next step
- Connect your device via USB to your PC.
- Transfer the SuperSu zip file to the internal memory  of your Samsung device.
- Now Boot your device into recovery mode (press and hold Volume Down button + press Power button)
- Install from sd card & select supersu zip, Than reboot your device.
*** In case you get stuck at boot loop, go to recovery and wipe cache and data.
For more info or face any problem please contact me on-
Facebook page: facebook.com/khushitelecom, My personal Facebook: facebook.com/laninimtiaz
Subscribe my YouTube: youtube.com/c/GsmLanin1, Follow on Twitter: twitter.com/khushi_telecom
We are trying to give our best but use this at your risk, We don,t responsible if there will be something get wrong with you.Thanks for choosing US & All the best. 


Read More

How to root Samsung J2 (J200H) using TWRP recovery

How to root Samsung J2 (J200H) using TWRP recovery
This tutorial will guide you to safely Root Samsung J2 SM-J200H with SuperSU. Here we will be using TWRP recovery to Flash the SuperSu Zip file to get root access on Samsung J2 SM-J200H. The Process is very simple and easy, just follow the step by step guide to Root.
"Root is needed if you want to Flash Custom ROMs and kernels.You can tweak your phone, overclock the CPU and use rooted application after rooting your device."
Warning:
I am not be held responsible for any kind of damage occurred to your Galaxy J2 SM-J200H while following this tutorial. Do it at your own risk. Remember rooting android device may void your warranty. This is only for 3g Models Not J200F not which is a 4g or Lte variant.
 Pre-Requirements
- Make sure your device has more than 40% battery.


Step By Step Guide
- Download TWRP Recovery file from the download section above and unzip the file.
- Now Boot your Samsung J2 SM-J200H device into Download Mode. just power off your device and then press, Volume Down + Power + Home. Press Volume Up now to continue to Download Mode.
-Then Connect the phone to your PC via USB cable and the ODIN application would notify an added message.If not then check the USB cable or re-install Samsung usb driver.
- choose AP or PDA in Odin Menu and select the TWRP Recovery file (You have downloaded and Unzipped, the .tar extension).
- The re-partition is not ticked in the Odin.
- Now click on the start button to start the Flashing process.
- Once the process is completed, you would notice the RESET or PASS message on the ODIN screen.
- Then your device would automatically  boot into recovery mode.
- Done!!! Now your Samsung has TWRP recovery updated.
Next step
- Connect your device via USB to your PC.
- Transfer the SuperSu zip file to the internal memory  of your Samsung device.
- Now Boot your device into recovery mode (press and hold Volume Down button + press Power button)
- Install from sd card & select supersu zip, Than reboot your device.
*** In case you get stuck at boot loop, go to recovery and wipe cache and data.
For more info or face any problem please contact me on-
Facebook page: facebook.com/khushitelecom, My personal Facebook: facebook.com/laninimtiaz
Subscribe my YouTube: youtube.com/c/GsmLanin1, Follow on Twitter: twitter.com/khushi_telecom
We are trying to give our best but use this at your risk, We don,t responsible if there will be something get wrong with you.Thanks for choosing US & All the best. 


Read More

How to root Samsung J5 J500FN using TWRP recovery

How to root Samsung J5 J500FN using TWRP recovery
This tutorial will guide you to safely Root Samsung J5 J500FN with SuperSU. Here we will be using TWRP recovery to Flash the SuperSu Zip file to get root access on Samsung J5 J500FN Lte.The Process is very simple and easy, just follow the step by step guide to Root.
"Root is needed if you want to Flash Custom ROMs and kernels.You can tweak your phone, overclock the CPU and use rooted application after rooting your device."
Warning:
I am not be held responsible for any kind of damage occurred to your Galaxy J5 J500FN while following this tutorial. Do it at your own risk. Remember rooting android device may void your warranty. This is only for J5 J500FN 5.1.1 Not other such as J500H & other.
J5 J500FN
Pre-Requirements
- Make sure your device has more than 40% battery.


Step By Step Guide
- Download TWRP Recovery file from the download section above and unzip the file.
- Now Boot your Samsung J5 J500FN device into Download Mode. just power off your device and then press, Volume Down + Power + Home. Press Volume Up now to continue to Download Mode.
-Then Connect the phone to your PC via USB cable and the ODIN application would notify an added message.If not then check the USB cable or re-install Samsung usb driver.
- choose AP or PDA in Odin Menu and select the TWRP Recovery file (You have downloaded and Unzipped, the .tar extension).
- The re-partition is not ticked in the Odin.
- Now click on the start button to start the Flashing process.
- Once the process is completed, you would notice the RESET or PASS message on the ODIN screen.
- Then your device would automatically  boot into recovery mode.
- Done!!! Now your Samsung has TWRP recovery updated.
Next step
- Connect your device via USB to your PC.
- Transfer the SuperSu zip file to the internal memory  of your Samsung device.
- Now Boot your device into recovery mode (press and hold Volume Down button + press Power button)
- Install from sd card & select supersu zip, Than reboot your device.
*** In case you get stuck at boot loop, go to recovery and wipe cache and data.
For more info or face any problem please contact me on-
Facebook page: facebook.com/khushitelecom, My personal Facebook: facebook.com/laninimtiaz
Subscribe my YouTube: youtube.com/c/GsmLanin1, Follow on Twitter: twitter.com/khushi_telecom
We are trying to give our best but use this at your risk, We don,t responsible if there will be something get wrong with you.Thanks for choosing US & All the best.
Read More

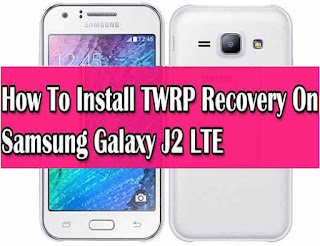
How to root Samsung J2 (J200F) using TWRP recovery

How to root Samsung J2 (J200F) using TWRP recovery
This tutorial will guide you to safely Root Samsung J2 (J200F) with SuperSU. Here we will be using TWRP recovery to Flash the SuperSu Zip file to get root access on Samsung J2 (J200F) Lte.The Process is very simple and easy, just follow the step by step guide to Root.
"Root is needed if you want to Flash Custom ROMs and kernels.You can tweak your phone, overclock the CPU and use rooted application after rooting your device."
Warning:
I am not be held responsible for any kind of damage occurred to your Galaxy J2 (J200F)while following this tutorial. Do it at your own risk. Remember rooting android device may void your warranty. This is only for 4g Models Not J200H which is a 3g variant.
Pre-Requirements
- Make sure your device has more than 40% battery.
Download Samsung j200F root file  
Step By Step Guide
- Download TWRP Recovery file from the download section above and unzip the file.
- Now Boot your Samsung J2 (J200F) device into Download Mode. just power off your device and then press, Volume Down + Power + Home. Press Volume Up now to continue to Download Mode.
-Then Connect the phone to your PC via USB cable and the ODIN application would notify an added message.If not then check the USB cable or re-install Samsung usb driver.
- choose AP or PDA in Odin Menu and select the TWRP Recovery file (You have downloaded and Unzipped, the .tar extension).
- The re-partition is not ticked in the Odin.
- Now click on the start button to start the Flashing process.
- Once the process is completed, you would notice the RESET or PASS message on the ODIN screen.
- Then your device would automatically  boot into recovery mode.
- Done!!! Now your Samsung has TWRP recovery updated.
Next step
- Connect your device via USB to your PC.
- Transfer the SuperSu zip file to the internal memory  of your Samsung device.
- Now Boot your device into recovery mode (press and hold Volume Down button + press Power button)
- Install from sd card & select supersu zip, Than reboot your device.
*** In case you get stuck at boot loop, go to recovery and wipe cache and data.
For more info or face any problem please contact me on-
Facebook page: facebook.com/khushitelecom, My personal Facebook: facebook.com/laninimtiaz
Subscribe my YouTube: youtube.com/c/GsmLanin1, Follow on Twitter: twitter.com/khushi_telecom
We are trying to give our best but use this at your risk, We don,t responsible if there will be something get wrong with you.Thanks for choosing US & All the best.


Read More